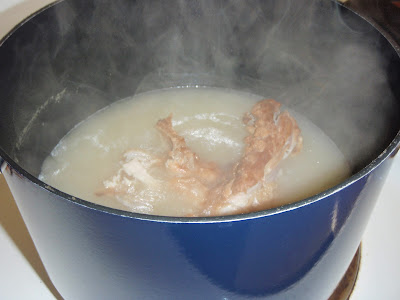
So I have this pumpkin. It's been on my porch you see. Uncarved. Since the middle of October. After the first of three pumpkins molded I said to myself "Hey you, you like to cook, you should disect that thing and roast it." Well hey me, that sounds delicious. Lets do it!
1 pumpkin- scooped and peeled and diced into large chunks.
1 can of coconut milk
4 cups of chicken broth
1 onion- diced
Olive oil- enough to coat all of the pumpkin
1 tsp Nutmeg
1 tbs Cinnamon
1 tsp Clove
4 tbs Curry Powder
2 tbs Garlic Powder, regular garlic can be roasted in with the pumpkin and onions
Salt and Pepper to taste
1. This will take a while but cut your pumpkin up. I cut it into giant strips, then used a paring knife to cut the guts off the strips. I then cut the strips into giant chunks between 2-3 inches long and wide, then stood them up on their sides and cut the skin off.
2. Dice up your onion and toss it in a bowl with the pumpkin pieces. Drizzle with olive oil, shake in your seasonings, and put your vegies in the oven for 30-35 minutes at 400F or until tender.
3. Let your veggies cool so they won't burn you in the blender, and start loading them up. Pour in your coconut milk and chicken broth in batches since it most likely wont all fit at once.
4. Pour your blended soup into a pot to be reheated on the stove. Feel free to thin out with more chicken stock or water to get it to the right consistency. I decided to add a pinch of chili flakes to spice things up, feel free to heavy up on the other spices to get the flavor just to your liking!
Super Senior Chef
Carbs, non-stick pan, fork. I will survive. Check out how to build your dorm kitchen- http://superseniorchef.blogspot.com/2012/02/build-your-kitchen.html
Sunday, January 13, 2013
Wednesday, January 9, 2013
Crabby Patties
So, little known fact about my Alma Matter, Humboldt State University, one of our alumni is Stephen Hillenburg the creator of Spongebob Squarepants and, thusly, the crabby patty. I have dined at both diners said to have inspired the Crusty Crab and the Chum Bucket, and by far, the Chum Bucket is my favorite. However I leave the debate up to you, I could use a visitor or two and I would be happy to give you the grand tour! The Crusty Crab is said to be inspired by Stars Diner and the Chum Bucket was inspired from Toni's Diner which used to be a block down the street from Stars but has since relocated to a different part of town.
Not trying to put the place down, but Stars diner is true to the depiction in Spongebob. Really great tasting food, but they seriously nickel and dime you for everything. Bring your own ranch if you need it with your fries, you will be charged extra. Toni's on the other hand, The Chum Bucket, is open 24/7 but the bummer is they are cash only. Aside from that though, I reccomend the onion rings and the chili dogs, but the chili dogs come with ketchup so unless you're into that remember to request it not be added.
That being said, if you are looking to add some Humboldt Spongebob to your day, I made some delicious crab cakes that reminded me of little sausage patties when cooked up and I felt they were best dubbed crabby patties!
Ingredients:
4 cans of crab meat
1/4 cup of mayonaise
1/2 cup Chex- your choice, I used rice since that was in my pantry
1/2 stack of Club crackers
2 eggs
1 tbs worchestershire sauce
3 tbs Old Bay Seasoning
2 tbs dried basil flakes
1 tbs paprika
1 tbs cajun seasoning
2 cups Canola or Veggie oil, or just enough to make a thin pool in your pan.
1. Crack those cans open, anything wet, minus the oil, needs to go in the bowl. Btw, make sure you have clean hands because there are no spoons needed, you will be mixing this with your fingers. Sprinkle in all your spices and pretend you're making mud pies. Enjoy it. You know you want to.
2. Smash up your crackers and your chex and squish those in. You don't want too big of chunks in there but you don't want powder either, these will stabilize your patties.
3. Hope you have been getting that oil hot! You need just enough to make a nice layer on the bottom of a non-stick skillet so you can get your patties crispy golden brown.
4. With your hands, make some little round patties just smaller than the palm of your hand and gently place them in the pan. They should fry on each side for about 2 minutes each or until they are golden brown. If they start to get too brown before a minute, your oil is too hot so turn that heat down. You should watch the patties puff up a little with the egg and crackers inside swelling up to hold all that yummy crab together.
5. DEVOUR. But make sure they have cooled a few minutes first. I burned myself on the pan reaching for something. Don't be like me. Be careful when using hot things. Be the adult. BTW- A plate with a paper towel on it is probably a good idea too, keeps the extra oil on the plate and not in your belly.
Tuesday, August 28, 2012
Diet Friendly Chunky Cabbage Soup
So either way you look at it, dieting sucks. However one great trick I have learned is that brothy soups help you keep diets in check because the liquid fills you up. Lucky for me, I also like the taste of cooked vegetables(but put a carrot stick in front of me and I'll take your finger instead). So here is a recipe I cook often in the winter. Also in this recipe, I had a leftover turkey carcase from a storebought roasted turkey breast that I picked the meat off of, and made my own stock. You do not have to do that, canned or boxed chicken broth will work just perfect.
Ingredients:
- 2 fat carrots
- 3 large celery stalks
- 1/2 giant sweet yellow onion
- 3-4 tbs Olive oil
- 5-8 cloves of garlic lightly chopped
- 1 head of napa cabbage
- 1tbs dried basil leaves
- 2tbs chicken boullion
- Pepper to taste
Broth- enough chicken stock to fill up half of a large soup pot or fill up your pot half way and boil your poultry bones on high while you chop all of your vegetables but the cabbage.
1. Put the olive oil in your pan and, on medium high heat, sweat down your Mirepoix(thats what you call your base mix of celery, onions, and carrots) and garlic until the onions are starting to become see through. Season with pepper but no salt, there is enough in your stock and in the boullion you will add later.
2. While those are sweating down, feel free to chop up your cabbage. I like it chunky, so I quarter the head of cabbage and then largely slice huge chunks.
3. When your onions are see through, add your broth, basil, and boullion. Bring all of this to a boil and then cover and turn the heat down to low. Let this simmer for a half hour.
4. After letting the carrots and celery get soft and flavor the broth, bring the heat back up to medium and stir in your cabbage. Let that cook for 10 minutes.
5. Serve while the stalks of the cabbage are still a little crunchy.
Friday, August 17, 2012
Creamy Turkey Kale Soup
Living at least 3 hours away from the nearest Olive Garden, I start to itch for some of its delicious menu items. Seeing as I cant make my bread sticks taste just like theirs, I settle for another favorite, the chicken and gnocchi creamy soup. My cravings building up, and my imagination becoming more vivid as craved, I did my best to figure out the ingredients. I think I did a pretty darn good job using my leftover turkey from the roast I picked up at the deli counter the other day.
Ingredients:
- 1 head of kale
- 1 pint of heavy whipping cream
- 8oz pack of gnocchi(little potato dumplings)
- 15oz can of cannellini beans
- 1 cup shredded turkey or chicken
- 3 14.5oz cans of chicken stock
- small hand full of garlic cloves
- 1 cup grated Parmesan cheese
- pinch of chili flakes
- 1 tbs dried basil leaves
- s&p
1. Begin by bringing the chicken stock to a simmer with the turkey or chicken meat in it for flavor. While that's on the stove, start tearing up your kale. You should only put the leaf part in your soup, none of the bitter stem.
2. Add your kale and all of your seasonings and garlic. Cover and let cook down for 25 minutes.
3. Drop gently your gnocchi into the stock and begin stirring in the heavy whipping cream. Keep your heat on medium low to low to keep from burning the cream.
4. Stir in your can of beans(drained) and your Parmesan cheese. This will begin to thicken the broth a little bit.
5. Cover and wait about another 10 minutes. Basically when your gnocchi are floating, the soup is ready to eat.
Wednesday, June 13, 2012
Braised Chicken- An ode to Bobby Flay and his ability to make any dish "Southwest"
Hey look, its that guy! So southwest cooking according to Chef Bobby Flay, as far as I have figured out, is adding peppers and corn to your dish. Ladies and gents, I give you ground dried pepper seasoning and canned corn. And the Lord called it sufficient.
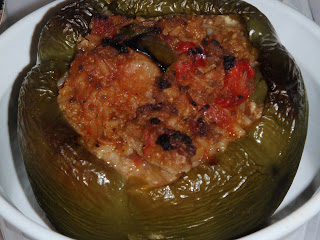
Anyways, so I was browsing the sale section at my grocery store, I noted that there were packages of skinless chicken thighs on sale and I had a half emptied bottle of red wine back at the house that had been open way too long and probably wouldnt taste as good to drink. What to do, what to do...
Ingredients:
6 skinless chicken thighs
2 14.5oz cans of diced tomatoes(fire roasted if you got it)
1 15.25oz can of Whole Kernel Sweet Corn
2 small onions, sliced
1.5 cups red wine
5-6 garlic cloves minced
2 tbs ground pasilla pepper
S&P to taste
Olive oil(enough to drizzle in pan)
1. Brown your chick-chick! Salt and pepper your chicken on both sides before putting it into the pan. Drizzle some olive oil in your pan, enough to coat the bottom very lightly and bring up to medium high heat. Brown your chicken on both sides for about 3-5 minutes each. Have a plate off to the side to set your chicken on when your done. *note- if your are using a not-stick pan, your chicken may not stick. Its ok if you don't get as many crunchies stuck to the bottom, the flavors are all still there.
2. Toss in the onions! Salt and pepper your onions and let them start to cook down. When your onions start to get slimy looking, add your garlic and turn the heat down to medium if things start to burn and just let all the flavors caramelize. This could take a little bit,10-15 minutes if you really let it cook down, but be patient, its worth the flavor.
3. Lets make some steam... Deglaze your pan by pouring in your redwine and scraping up all the yummy bits attatched to the bottom. Bring that up to a simmer and add your can of tomatoes, juice and all. Add your ground pasilla pepper and let that stew for about 5 minutes.
4. Pop the crusty chicken back into your goulash and let it cook at medium low to low heat for 30-35 minutes. Covered or uncovered is your choice, I usually cover it mostly, letting the steam out to prevent tomato splatter from getting all over my kitchen.
5. Drain your can of corn and toss your kernels in, let your mix cook for another 10 minutes.
6. DEVOUR! Very tasty over rice.
Monday, February 27, 2012
Jordan's Favorite- Tomato Basil Soup with Mozzarella
My former roommate Jordan requested this recipe. This being her birthday and me not being anywhere near her now, here is my online present. Sorry you're not here to enjoy it. Make it yourself and do your own dishes, deserter. (love you!) This is a tomato, basil and, wait for it, red wine soup and when served hot you drop mozzarella cubes or balls so they melt and get all yummy in the broth.
Ingredients:
- 1 Cup Red Wine
- Handful of Basil
- 1 Small Onion
- 6-7 Garlic Cloves
- 2 TBS Chicken and Tomato Bouillon
- 2 Cans of Italian Seasoned Diced or Stewed Tomatoes
- 4 Cups of water
- 2 TBS Olive Oil
- S&P
1. Lets get those onions going. Quarter your onion and then thinly slice it up. Get your sauce pan(soup pot) hot. Coat the pan with olive oil and toss your onions in quickly so your oil doesn't burn. Salt and pepper your onions and put on medium high heat to let them start to caramelize down.
2. While the onions are getting golden, mince your garlic and add it it.
3. When everything is golden caramel brown and you see some crust on the bottom of the pan you are going to pour in your wine to deglaze it. Let the wine start to boil off so the alcohol can be removed.
4. While that's boiling mix your bouillon in 2 cups of water and pop it in the microwave for a minute. This will help the seasonings dissolve in the water before pouring it into the soup.
5. Add your tomatoes one can at a time. Between adding cans let the pot come back to a boil before adding the next ingredient.
6. Pour in the broth you mixed up and let things start to meld together and let those flavors get yummy.
7. Grab a hand full of basil, but not all of it, and chiffonade the leaves. Toss them in the pot. Save a few leaves to garnish your soup at the end.
8. If your Mozzarella needs to be sliced up now is the time to do it, assuming you bought one large ball and not a container of small bite sized balls. Make it into bite sized chunks.
9. Taste your soup and if you think its flavors have melded well, go ahead and serve it up. If not leave it for another 10 minutes or so.
10. Pour your soup into a bowl, drop your mozzarella on top, add a sprig of basil, impress your friends.
Saturday, February 25, 2012
Stuffed Peppers
Make the filling and keep it in the fridge to cook one pepper at a time as you are hungry for one or cook up a bunch of peppers at once for your whole dorm suite. There's also the option of skipping the pepper stuffing altogether and just eating the stuffing. I had some with crackers. It made my tummy happy.
Ingredients:
~Filling
- 1 Box Spanish Style Rice-A-Roni
- 1 Can of Diced Tomatoes(for the Rice-A-Roni)
- 1 lb ground beef or turkey
- 1 small onion(diced)
- 2 Bell Peppers(diced)- I like one red and one green but colors are up to you.
- 5 Cloves of Garlic(minced)
- As much hot sauce of your choice as you can handle.(I used about 6 good dashes of Cholula)
- Seasonings to your taste.(I used garlic powder, paprika, onion powder, pepper but no salt since there is plenty in the Rice-A-Roni seasonings packet)
~Pepper Stuffing Business
- Large bell pepper that can stand on it's own.
- Yellow Processed American Cheese(I used Kraft singles but cubed up Velveeta is great too)
1. Get your Rice-A-Roni started. Follow the directions on the box.
2. In another pot get your ground up meat of choice browning and slice up your onion, peppers, and garlic. Toss the vegetables into the meat pan as soon as they are diced up. Add your hot sauce and seasonings.
3. Once your Rice-A-Roni is cooked(takes about 15 minutes) preheat your oven to 350*F.
4. In whichever pot is bigger, mix together your Rice-A-Roni and meat/veggie mix.
5. Decide how many peppers you are going to make and clean them out. Cut a hole in the top and pop out the center seeded mass of crap. With a spoon scrap out the spongy white-ish webbing and the rest of the seeds. To get the rest of the seeds out it may be easier to just rinse it out in your sink.
6. Set pepper(s) onto some tray or other baking safe platform to cook your peppers on. Lets make some lasagna. Start with a couple of pieces of cheese in the bottom and add a scoop of meaty rice goodness. Repeat. Add a couple more pieces of cheese, ricey meaty goodness and repeat. Again. Again. Oh yeah. Again. Full? Sweet.
7. Put your pepper(s)in the oven for an hour. Don't do what I did and pick at the extra filling until the peppers come out. I was too full to eat my peppers. Bad life decisions, don't make them.
8. At about 50 minutes check your peppers to see how brown they are on top, they may come out earlier if they look toasty good.
9. Plate it up! I decided to eat mine in a bowl cause its really juicy. I might suggest a piece of toast to sop up the goodness.
Subscribe to:
Posts (Atom)